If you’re dealing with fire damage, first of all—take a deep breath. You’ve already been through a lot, and we’re here to help make the next part a little easier. Filing a fire damage insurance claim may sound daunting, but when you know what steps to take, you’ll be better prepared to handle it. Here at Sapphire, we’ve walked countless people through the process, and we know a thing or two about what makes a claim go smoothly. Let’s dive into what you need to know and do to make sure you’re getting the best possible support from your insurance.
Step 1: Keep Safe and Stop Any More Damage
We know you’re eager to jump into the insurance claim process, but safety comes first. Make sure the area is safe for you and your family to be in before doing anything else. If the fire was severe, wait for the fire department or another authority to tell you it’s safe to return. When you can safely go back inside, do a quick scan of the area to check for anything that could cause further damage.
Covering any exposed parts of the house, turning off water to leaking pipes, or moving items away from damaged spots are all great steps to protect your property from getting worse. Most insurance companies expect you to prevent additional damage if possible, so take pictures of these “damage control” efforts and hold onto any receipts if you need supplies. These little steps might seem tedious now, but they can help strengthen your case when you file.
Read more: Complete Guide to Assessing Fire Damage: What You Need to Check
Step 2: Call Your Insurance Company Right Away

Once everyone’s safe, it’s time to call your insurance company. Yes, even if it’s late or on the weekend! Many insurance companies have 24-hour hotlines, so there’s no reason to wait. You want to get your claim on their radar as soon as possible to start the process and avoid delays.
During that first call, they’ll ask some initial questions like the date of the fire, what caused it (if known), and the extent of the damage. Don’t worry if you don’t have all the answers right away. They’ll assign an adjuster to you, who will guide you through the next steps. Think of your adjuster as the insurance company’s detective—they’ll come to your property to assess the damage and determine what your policy covers.
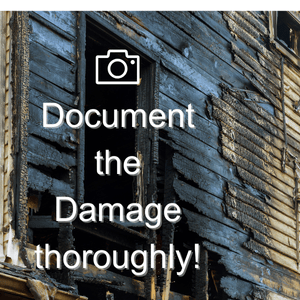
Step 3: Document the Damage Like a Pro
This is your time to play detective, too! Before anything is moved or cleaned, grab your phone and document everything. Take clear photos and videos of the damage, both up close and wide shots, so the insurance company gets the full picture. The goal here is to be as thorough as possible because once things start getting moved, it’s hard to recreate the scene.
Along with visual evidence, make a list of everything that’s been damaged. Start with big-ticket items like furniture, appliances, or electronics, then move on to smaller things. For each item, include details like the original cost and estimated value. Receipts or purchase records are gold here, so if you have them, gather them up. This detailed record of your belongings can help you get a fair payout.
Step 4: Dust Off Your Policy and Review It
We get it—reading through an insurance policy can feel like deciphering ancient hieroglyphics. But trust us, it’s worth understanding what your policy covers and any limits or exclusions that apply. Some policies have specific limits on what they cover for fire damage, and there might be exclusions (things they won’t pay for) hiding in the fine print.
Most policies also have a deductible, the amount you’re responsible for paying before insurance kicks in. Be aware of that number so you’re not surprised when it’s subtracted from your payout. This is also the time to look at what’s covered under Additional Living Expenses (ALE), which can help with temporary housing or extra expenses if your home is unlivable.
Step 5: Meet Your Claims Adjuster and Show Them the Damage

Once assigned, your claims adjuster will schedule an inspection to assess the damage in person. This is where that documentation you gathered earlier comes in handy! Be prepared to walk them through the property, point out areas of damage, and share your photos, videos, and item list.
While it’s easy to feel a little nervous with an adjuster around, remember they’re there to evaluate your case fairly. It’s okay to ask questions if you don’t understand something, and if the final estimate seems low, don’t hesitate to ask for a second opinion.
Step 6: Get Repair Estimates from Trusted Contractors
One pro tip is to get several repair estimates from licensed contractors. These quotes will give you a clearer idea of the actual cost of repairs, and they’re helpful for negotiating if the insurance company’s offer doesn’t cover everything. We know this part can feel overwhelming, but multiple estimates can save you a lot of headaches (and dollars) down the line.
Some insurance companies work with preferred vendors, which can streamline things, but you’re not required to go with one of their contractors. Choose someone who has experience with fire restoration and can meet your needs (like Sapphire Restoration!).
Step 7: Keep Track of All Expenses (Even the Small Ones)
If you’re out of your home, you’ll likely be spending on things like temporary housing, food, and possibly transportation. Your policy might cover these as “Additional Living Expenses,” but keep all receipts to prove the costs. Don’t overlook any expenses, even small ones. They can add up, and you don’t want to miss out on reimbursement.
It’s helpful to track these costs as you go, either in a spreadsheet or a dedicated file. Staying organized now will make the claims process smoother.
Step 8: Stay Organized and Follow Up Regularly
When dealing with insurance, organization is your best friend. Keep a folder with all claim-related documents—emails, receipts, contractor estimates, and notes from your adjuster’s visits. This way, if you need to refer back to something, everything’s in one place.
Following up regularly with your adjuster can keep things moving. If weeks go by without an update, it’s perfectly fine to call and ask for a status update. Don’t let things slip through the cracks just because you’re waiting on their end.
Common Pitfalls to Avoid
Even if you’re following every step, there are a few common pitfalls that could trip you up.
- Avoid waiting too long to file, as delays can complicate things.
- Don’t skimping on documentation. It might feel over-the-top, but more documentation often means a stronger claim.
- And finally, don’t rush to accept the first settlement if it seems low—there’s usually room for negotiation.
When to Call in Backup (Public Adjusters or Legal Help)
Sometimes, insurance claims can get a bit sticky. If you’re feeling overwhelmed or if there’s a big disagreement on what’s covered, you might consider hiring a public adjuster. These pros work for you, not the insurance company, and can help get a fair settlement. In extreme cases, legal help might be necessary, especially if you feel your claim is being mishandled or unfairly denied.
Some Helpful Resources
- Filing a Homeowners Insurance Claim After a Fire– Consumer Reports
- Top 10 Tips for Filing Fire Insurance Claims– Find Law
- Insurance Claim Tips For Partial Loss Fires– United Policyholders
- Fire Insurance Claims by Homeowners & The Legal Process – Justia
- Fire Damage Insurance Claims Tips & Advice- Claimsmate
Sapphire Has Your Back in the Fire Damage Insurance Claim Process
We know how difficult it can be to navigate a fire damage claim on your own, especially when you’re already dealing with the emotional toll of a fire. But following these steps can help you stay on top of things and get the best possible outcome from your claim. If you have questions or need additional support, give Sapphire a call. We’re here to help guide you through the process, so you can focus on what matters most—getting your life back to normal.
Ready to start the claims process or need expert advice? Contact us today, and let us help you make the road to recovery as smooth as possible.

