Drywall water damage is a headache no homeowner or property manager wants to face. Yet, when it strikes, the consequences can be more than just cosmetic. Left unchecked, water damage can lead to serious structural issues, health hazards from mold, and skyrocketing repair costs. That’s why catching it early and taking swift action is essential. In this post, you’ll learn how to spot the telltale signs of water damage in sheetrock, uncover the common culprits, and discover how to restore your walls to their original condition. With Sapphire Restoration on your side, you can protect your walls and your peace of mind.
Signs of Water-Damaged Drywall
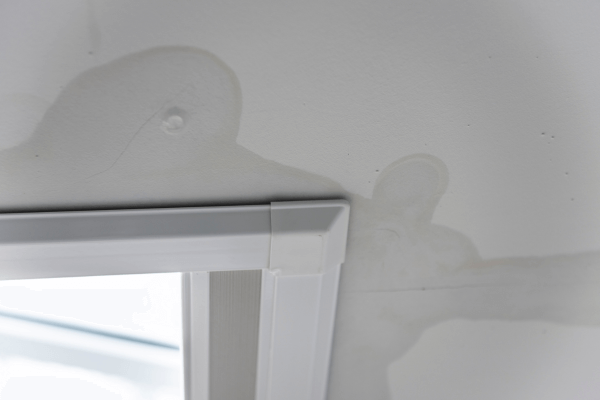
Visible Water Stains or Discoloration
One of the most apparent signs of water damage is discoloration or water stains on the walls or ceilings. These stains can range from yellowish to brown and indicate that water has seeped into the drywall.
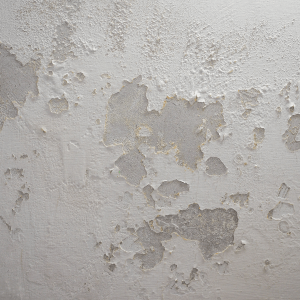
Bubbling, Peeling, or Cracking Paint
When drywall absorbs water, it can cause the paint to bubble, peel, or crack. This is a clear indication that there’s moisture trapped behind the wall or ceiling, which needs immediate attention.
Soft or Spongy Drywall
If you press against the sheetrock and it feels soft, spongy, or crumbly, it’s a sign that the material has absorbed a significant amount of water. This weakened state can compromise the integrity of the wall.
Warping or Bulging Sheetrock
Water damage can cause the drywall to warp or bulge. This is particularly noticeable when the wall starts to bow out or sag, indicating severe water absorption.
Musty or Moldy Odor
A persistent musty or moldy smell is a strong indicator of water damage. Mold thrives in damp environments, and its presence is a clear sign that there’s moisture in your drywall.
Common Culprits Behind Water-Damaged Drywall
Water damage to drywall can originate from several sources, often catching homeowners and property managers off guard. Here are some of the usual suspects:
-
- Leaky roofs: A compromised roof can allow water to seep into your walls and ceilings.
- Faulty plumbing: Hidden leaks from pipes behind walls can slowly soak drywall, causing unseen damage.
- Burst pipes: A sudden burst pipe can flood areas of your home, leading to immediate and extensive drywall damage.
- High humidity levels: Constant high humidity can saturate drywall over time, leading to mold growth and weakening of the structure.
- Poor ventilation: Without proper airflow, moisture can build up, especially in bathrooms and kitchens, eventually damaging walls.
- Flooding: Natural disasters or localized flooding can saturate drywall quickly, requiring urgent attention.
- Condensation buildup: Windows and walls can accumulate condensation, which, if not managed, can trickle down into the drywall, causing damage.
Dangers of Ignoring Water-Damaged Drywall
Health Risks Associated with Mold and Bacteria
Don’t ignore potentially water-damaged sheetrock It can create a breeding ground for mold and bacteria, posing significant health risks. According to the EPA’s Mold Guide, mold spores can cause respiratory issues, allergies, and other health problems, especially for individuals with pre-existing conditions.
Structural Damage to the Property
Prolonged water exposure can weaken the structural integrity of your property. It can cause wood rot, corrode metal, and degrade other building materials, leading to costly repairs and potential safety hazards.
Potential for Increased Repair Costs
The longer water damage is left unaddressed, the more extensive the damage becomes. This can result in higher repair costs as more significant sections of drywall and possibly other structures may need replacement.
A Step-by-Step Guide to Repairing Water-Damaged Drywall: When to DIY and When to Call the Pros
Step 1: Assess the Damage
The first step is to assess the extent of the damage. Light stains or small damp areas can often be handled on your own, but extensive damage may require professional intervention. Here’s how to determine the severity:
- Surface Stains and Minor Damage: If the damage is limited to surface stains or small areas where the drywall is slightly soft, you can likely handle the repair yourself.
- Extensive Water Damage: If the drywall is severely warped, bulging, crumbling, or has visible mold growth, it’s best to call in professionals. These signs indicate that the damage is widespread and possibly affecting the structural integrity of your walls.
Step 2: Prepare the Area
Before beginning any repairs, it’s essential to prepare the affected area properly:
- Turn Off the Water Source: If the water damage was caused by a plumbing issue, make sure to turn off the main water supply to prevent further damage.
- Remove Excess Water: Use towels, mops, or a wet/dry vacuum to remove any standing water. Ensure the area is as dry as possible before starting repairs.
- Ventilate the Area: Open windows and use fans or dehumidifiers to increase airflow and reduce moisture levels. Proper ventilation will help dry out the drywall and prevent mold from developing.
Step 3: Cut Out The Damage
If the damage is more than superficial, you’ll need to cut out the affected section of drywall:
- Mark the Area: Use a straight edge to mark the area of drywall that needs to be removed. Make sure your lines are straight to make patching easier.
- Cut the Drywall: Use a utility knife or drywall saw to carefully cut along the marked lines. Remove the damaged section, being cautious of any wiring or plumbing behind the wall.
Step 4: Install the New Drywall
Once the damaged drywall is removed, it’s time to install a new piece:
- Measure and Cut: Measure the opening and cut a new piece of drywall to fit. It’s essential to cut the new piece slightly smaller than the opening to ensure a snug fit.
- Secure the Drywall: Attach the new drywall piece to the wall studs using drywall screws. Make sure it’s firmly in place and aligned with the surrounding drywall.
Step 5: Tape, Mud, and Sand
Now that the new sheetrock is in place, you’ll need to finish the surface so it blends seamlessly with the existing wall:
- Apply Joint Tape: Place joint tape over the seams between the new drywall and the existing wall.
- Apply Joint Compound: Use a putty knife to apply a layer of joint compound over the tape, smoothing it out to create an even surface.
- Sand the Surface: Once the joint compound is dry, sand the area until it’s smooth and level with the rest of the wall. Repeat the mudding and sanding process if necessary for a flawless finish.
Step 6: Prime and Paint
With the drywall repaired, the final step is to prime and paint the area:
- Apply Primer: Use a primer to cover the repaired area, ensuring the new paint adheres well and matches the surrounding wall.
- Paint the Wall: Once the primer is dry, paint the wall with your chosen color, blending the repaired area with the rest of the room.
When to Call in the Pros
While many homeowners can handle minor drywall repairs, there are times when it’s best to leave it to the experts:
- Extensive Damage: If the damage covers a large area or involves multiple sections of drywall, professional help is essential to ensure the job is done correctly.
- Mold Growth: If you discover mold during your assessment, it’s crucial to call in professionals. Mold can pose serious health risks and requires specialized treatment to remove safely.
- Structural Concerns: If you suspect that the water damage has compromised the structural integrity of your walls, don’t hesitate to call in the pros. They have the expertise and equipment to handle significant repairs and prevent further damage.
Why Sapphire Restoration?
Sapphire Restoration specializes in water damage restoration. Here’s why you should consider their services:
- Expertise: With years of experience, their team is skilled in handling all types of water damage.
- Advanced Equipment: They use state-of-the-art equipment and techniques to ensure thorough restoration.
- Efficient Service: Quick response times and efficient service minimize disruption to your daily life.
- Preventive Measures: They provide solutions to prevent future water damage, ensuring long-term protection for your property.
Protecting Your Home from Water Damage
Repairing water-damaged drywall can be manageable for minor issues, but for extensive damage, mold growth, or structural concerns, calling in professionals is the best course of action. By following this guide, you’ll be able to assess the situation, take appropriate steps, and ensure your drywall is restored to its original condition—keeping your home safe and sound.
Don’t wait until the damage worsens—contact Sapphire Restoration today for a free inspection and ensure your home or property remains safe and sound.