
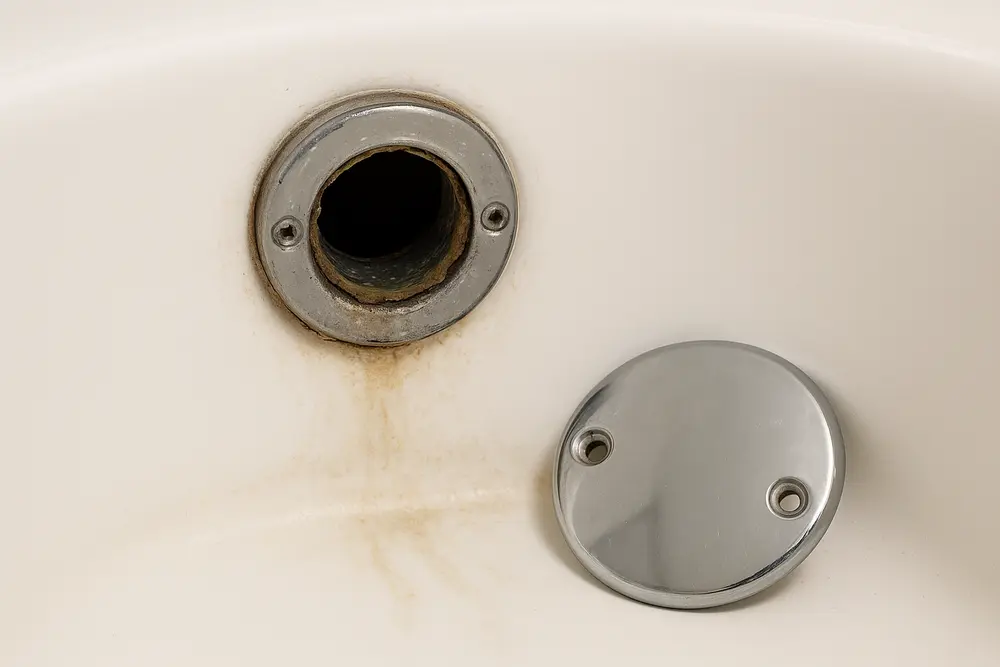
Your bathroom can look perfectly innocent while a bathtub overflow gasket leak sends water down the back of the tub, into the wall cavity, and across the ceiling below. The leak may happen only when somebody fills the tub high enough, shifts around and makes waves, or aims shower spray at the overflow opening. Then the water disappears again, leaving concealed wall moisture to do its expensive little side hustle.
Replacing the gasket may stop the plumbing leak, but it doesn’t dry wet insulation, repair swollen drywall, or remove moisture from framing. If water has escaped behind the tub, the job isn’t finished until the affected materials have been inspected, dried, and restored.
What Is a Bathtub Overflow Gasket?
The overflow plate is the visible metal cover near the upper portion of the tub. Behind that plate is an overflow opening connected to an elbow or tube inside the plumbing cavity. A gasket sits between the back of the tub and that overflow fitting.
When the plate screws are tightened properly, they pull the overflow elbow toward the tub and compress the gasket. That compressed gasket creates the watertight connection. The shiny plate may get all the attention, but the gasket behind it is doing the actual work.
Overflow assemblies vary. Some have one screw, some have two, and some are tied to a trip-lever drain mechanism. Gaskets may be flat, tapered, foam, rubber, or shaped for a particular fitting. There’s no universal installation direction that applies to every tub, so the replacement should match the assembly and be installed according to the manufacturer’s instructions.
Why the Overflow Gasket Starts Leaking
Gaskets don’t last forever. Years of compression can flatten rubber or foam until it no longer springs back. The material may harden, split, shrink, or slide out of position. Loose screws can reduce pressure on the seal, while corrosion can prevent the hardware from tightening evenly.
Misalignment is another frequent troublemaker. If the overflow elbow shifts backward or sits crooked behind the tub, a new gasket may not seal properly. Tub movement can contribute, especially if the tub flexes under weight or the waste-and-overflow assembly isn’t securely positioned.
Previous repairs can also create trouble. A thick ring of caulk around the faceplate may look industrious, but it often hides the real failure instead of fixing it. Other possible causes include:
- An incorrectly sized or backward gasket
- A cracked overflow elbow or tube
- Damaged screw threads or corroded hardware
- A chipped or damaged tub surface near the opening
- Loose connections elsewhere in the waste assembly
Caulking the faceplate isn’t a substitute for correctly compressing the gasket. The overflow also shouldn’t be blocked, because it’s designed to accept water before the tub spills over its rim. If a particular assembly calls for sealant in specific locations, follow its instructions rather than improvising with half a tube of bathroom caulk and raw optimism.
Why the Leak Can Stay Hidden
A bathtub overflow gasket leak usually releases water into a narrow cavity behind the tub. From there, gravity takes over, and gravity doesn’t care that you recently painted the dining room ceiling.
Water can run down the exterior of the tub, wet the paper backing of nearby drywall, soak insulation, and collect on the wall’s bottom plate. It may reach the subfloor around the tub or follow pipes and framing into the level below. Once it lands on ceiling drywall, it can travel horizontally before finding a seam, screw hole, light opening, or low spot.
That’s why the visible stain isn’t always directly beneath the overflow fitting. A six-inch ceiling ring also doesn’t prove that only six inches are wet. The stain marks where water became visible, not necessarily the full moisture boundary.
The opposite is true too. An old stain may remain after the materials have dried. Color alone can’t tell you whether water is currently active. Moisture testing and inspection are needed to separate an old scar from an ongoing leak.
Signs of Concealed Wall Moisture
The best clue is often timing. If dripping starts only when the bathwater reaches the overflow, the gasket or overflow assembly moves high on the suspect list. If leaking occurs while the tub is filled below the overflow, another component may be responsible.
Clues Around the Bathtub
Look for an overflow plate that’s loose, tilted, corroded, or no longer sitting evenly against the tub. A visible gap is suspicious, but a plate that looks normal can still hide a failed gasket.
Other warning signs include a musty odor, recurring discoloration around the tub, swollen trim, soft wall finishes, lifting flooring, or water appearing at the bottom of the wall after someone takes a bath. Drywall can look fine from the room while its paper backing is wet inside the cavity.
Clues in the Adjacent Room
The opposite side of the tub wall may tell the story before the bathroom does. Check shared bedrooms, hallways, and closets for peeling paint, damp drywall, stained baseboards, wet carpet, damaged flooring, or a persistent musty smell.
Closets are especially good at hiding damage. They’re dark, poorly ventilated, and often packed with boxes that nobody has opened since three addresses ago.
Clues on the Floor Below
A brown or yellow ceiling stain beneath an upstairs bathroom is a classic warning, but don’t wait for a dramatic drip. Bubbling paint, softened drywall, sagging areas, or a stain that darkens after bathing can all indicate recurring water exposure.
If water is near a light fixture, exhaust fan, or electrical wiring, stop using the tub and treat the area as an electrical hazard. Don’t touch a wet fixture, and don’t stand underneath sagging ceiling drywall. Contact qualified professionals to make the area safe.
What the Timing of the Leak Reveals
When water appears can help narrow the source. It isn’t absolute proof, but it gives a plumber a much better starting point than, “The ceiling does a weird thing sometimes.”
| When Water Appears | Possible Source |
|---|---|
| Only when water reaches the overflow | Overflow gasket, elbow, plate compression, or nearby connection |
| While water sits below the overflow | Drain shoe, tub body, supply plumbing, or another unrelated source |
| Only while the tub drains | Waste piping, trap, drain shoe, or a loose connection |
| During every shower | Valve trim, shower arm, enclosure, tub perimeter, supply plumbing, or overflow exposed to spray |
| When water hits the tub edge | Failed perimeter seal, enclosure leak, curtain problem, or wall transition |
A ceiling stain below a tub doesn’t automatically convict the overflow gasket. Drain fittings, traps, supply lines, valve bodies, tub spouts, cracked surrounds, and enclosure seals can produce similar symptoms. Good diagnostics isolate each component instead of throwing replacement parts at the bathroom until the dripping gets bored.
How Professionals Confirm the Leak
If water is already reaching a ceiling, don’t repeatedly fill the tub to reproduce the leak. Each test can add more water to insulation, drywall, and electrical cavities. A plumber or water-damage professional can perform controlled testing while observing the fitting and monitoring nearby materials.
Testing often begins with a visual inspection of the overflow plate, screws, drain assembly, tub surface, access panel, adjacent room, and ceiling below. If conditions allow, water may be held below the overflow to determine whether another part leaks before the overflow is involved.
The overflow can then be tested with a limited and controlled amount of water while somebody observes the back of the assembly through an access panel, borescope opening, or existing damaged area. Drain and shower-perimeter tests may be performed separately. This isolates the source without turning the bathroom into a low-budget water park.
A moisture meter helps map elevated moisture in drywall, wood, and other materials. It doesn’t identify the plumbing defect by itself, and it can’t prove mold is present. Readings must be compared with dry reference areas and interpreted according to the material being tested.
An infrared camera can reveal temperature differences associated with wet or evaporating materials. It doesn’t see through walls or photograph water hiding inside them. Suspicious thermal patterns should be confirmed with a moisture meter and, when necessary, a targeted physical inspection.
Replacing the Gasket Isn’t Restoration
A plumber repairs the failed plumbing component. That work may involve removing the plate, inspecting the overflow elbow, correcting alignment, installing the proper gasket, replacing damaged screws or fittings, and conducting a controlled leak test.
A restoration contractor addresses what the escaped water did to the building. These are related jobs, but they’re not the same job. Tightening two screws doesn’t magically wring water out of insulation three feet below.
A proper restoration assessment establishes how far moisture traveled. That may require checking the bathroom wall, adjacent room, subfloor, framing, and ceiling below. Photographs, moisture readings, affected-area diagrams, plumbing invoices, and drying records should be kept, especially if an insurance claim may be considered.
Insurance coverage varies by policy. Insurers may treat sudden accidental water damage differently from long-term seepage, neglected maintenance, or the cost of replacing the failed gasket itself. Document the condition and consult the insurer rather than assuming the damage is covered or excluded.
Restoring Wet Building Materials
Water-damage restoration starts after the source has been stopped and the repair has been verified. The affected cavity then needs enough access for inspection, cleaning, drying, and moisture monitoring. Closing a wall based on how the paint feels is not verification.
Drywall
Drywall may need removal if it’s soft, swollen, crumbling, delaminated, contaminated, mold-affected, or wet long enough to lose integrity. Removal may also be necessary when otherwise decent-looking drywall blocks access to soaked insulation or framing.
Not every damp sheet must automatically be demolished. The decision depends on moisture level, duration, water conditions, material condition, and whether the cavity can be dried effectively. Ceiling drywall deserves extra caution because saturation can reduce its strength.
Insulation
Wet fibrous insulation can trap moisture against framing while restricting airflow through the cavity. It may slump, lose performance, and remain wet after the room-facing drywall appears dry.
Depending on the insulation type and exposure, removal is often needed so the cavity can be inspected and dried. Blowing air at a closed wall won’t accomplish much if soggy insulation is sitting inside like a damp winter coat.
Wood Framing
Structurally sound framing can often be dried rather than replaced. It should be exposed where necessary, checked for deterioration, cleaned when appropriate, and dried to a documented target suitable for the building and local conditions.
Repeated wetting increases the chance of decay and material damage. Dark staining alone doesn’t prove structural failure, and framing shouldn’t be described as damaged beyond repair without an actual inspection.
Subflooring
The subfloor edge near a bathtub can be difficult to reach. Soft flooring, swelling at panel seams, loose tile, movement near the tub apron, elevated moisture readings, or staining visible from below can signal a problem.
Drying may require access from the bathroom, an adjacent room, or the ceiling below. If the subfloor has lost strength or deteriorated, repairs should be planned before new flooring or ceiling finishes hide the evidence.
Ceilings
Wet ceiling drywall can hold water and lose strength. Don’t casually poke a sagging area with a broom handle to “let it drain.” That’s a fine way to receive a bucket’s worth of dirty water and half a ceiling at the same time.
Keep people away from the area and have the ceiling evaluated. If electrical components are involved, electrical safety comes before drying or demolition.
How Structural Drying Should Work
Drying isn’t just placing a fan in the bathroom and hoping for character development. Restoration professionals establish the moisture boundary, remove materials that can’t be retained, expose trapped moisture, and select air movement and dehumidification based on actual conditions.
Air movers increase evaporation from wet surfaces. Dehumidifiers remove water vapor from the air so that evaporation can continue. Equipment placement, temperature, cavity access, and material type all affect the drying process.
Moisture levels should be monitored throughout the job. Drying goals are typically based on unaffected reference materials, project conditions, and accepted professional practices. The ANSI/IICRC S500 standard provides an industry framework for water-damage inspection, drying, monitoring, and documentation.
Reconstruction should begin only after drying has been verified. Installing new drywall over wet framing doesn’t erase the problem. It gives the moisture a fresh paper surface to ruin.
Can an Overflow Leak Cause Mold?
Yes, recurring or unresolved moisture can support mold growth, especially on drywall paper, dust, wood, and insulation. A musty odor with no visible growth may justify investigation because mold can remain concealed behind drywall and other finishes.
The EPA’s homeowner guidance recommends drying wet materials within 24 to 48 hours where possible. That time frame reduces risk, but it isn’t a guarantee. Temperature, humidity, material type, airflow, and the history of wetting all influence what develops.
A cavity that’s been wet for more than two days deserves closer evaluation, but the clock doesn’t diagnose mold. Neither does a moisture meter. Dark discoloration also can’t be identified to a mold type by sight alone.
If hidden growth is suspected, opening the cavity should be planned carefully. Disturbing contaminated drywall or insulation can release dust and spores into occupied areas. The EPA provides separate guidance on hidden mold, and people with asthma, allergies, immune suppression, or other health concerns should avoid cleanup exposure.
Bleach, paint, or antimicrobial spray doesn’t replace source correction, material removal when needed, physical cleaning, and drying. Never mix bleach with ammonia or other cleaning chemicals.
When to Call for Professional Help
Stop using the tub and request prompt assistance when water is dripping through a ceiling, the ceiling is sagging, or moisture is near wiring or a light fixture. Professional evaluation is also appropriate when the leak has likely happened repeatedly, the source can’t be isolated, or wet materials extend into insulation, framing, or subflooring.
A plumber should inspect and repair the waste-and-overflow assembly or other plumbing source. A restoration contractor should evaluate the moisture migration and damaged building materials. In many cases, you’ll need both. One stops the water; the other handles where it went.
Visible mold, persistent odors, extensive damage, HVAC involvement, or medically vulnerable occupants can change how the work should be contained and performed. The EPA’s roughly 10-square-foot reference is commonly used for many small mold cleanup situations, but it isn’t blanket permission to open any wall yourself. Hidden growth and significant water damage can require professional controls even when the visible spot is small.
Bathtub Overflow Leak FAQs
Can the Gasket Leak Only When the Tub Is Full?
Yes. Some gasket failures stay dry until water reaches the overflow opening. Waves from a person moving in a full tub or shower spray entering the opening can also trigger an intermittent bathtub overflow gasket leak.
Why Isn’t the Stain Below the Overflow?
Water can follow the tub exterior, pipes, framing, fasteners, and the upper surface of ceiling drywall before becoming visible. The stain marks the exit point, not necessarily the source or the full wet area.
Can I Repair the Gasket With Caulk?
Surface caulk generally can’t replace the gasket behind the tub. The correct repair may require repositioning the overflow elbow, replacing the gasket, correcting loose hardware, or replacing cracked and corroded parts. Follow the assembly manufacturer’s instructions.
Does Wet Drywall Always Need Replacement?
No. Replacement depends on saturation, exposure time, contamination, physical condition, mold concerns, and whether removal is needed to reach wet insulation or framing. Soft, swollen, deteriorated, or mold-affected drywall is much less likely to be retained.
Can a Moisture Meter Find the Leak?
A moisture meter can help map concealed wall moisture, but it doesn’t independently identify the failed plumbing part. Controlled testing and visual inspection are still needed. It also doesn’t prove mold is present.
Can a Thermal Camera See Behind Walls?
It can detect surface temperature patterns that may correspond with wet materials or evaporation. It can’t see water directly or look through a wall like an X-ray. Findings should be confirmed using other inspection methods.
Does a Plumber Repair the Wet Ceiling?
Usually not. A plumber repairs the source, while a restoration contractor evaluates, dries, removes, and reconstructs affected building materials. Ask each contractor to define the scope clearly so wet cavities don’t fall into the gap between trades.
Don’t Seal Moisture Behind a New Wall
A new overflow gasket can stop the next leak, but it can’t undo the previous ones. If you’ve found a ceiling stain, musty odor, swollen trim, or wet drywall near a bathtub, have the source repaired and the concealed cavity assessed before cosmetic work begins. Sapphire Restorations can help evaluate hidden bathroom water damage, establish the moisture boundary, and restore affected materials after the plumbing problem has been corrected.