
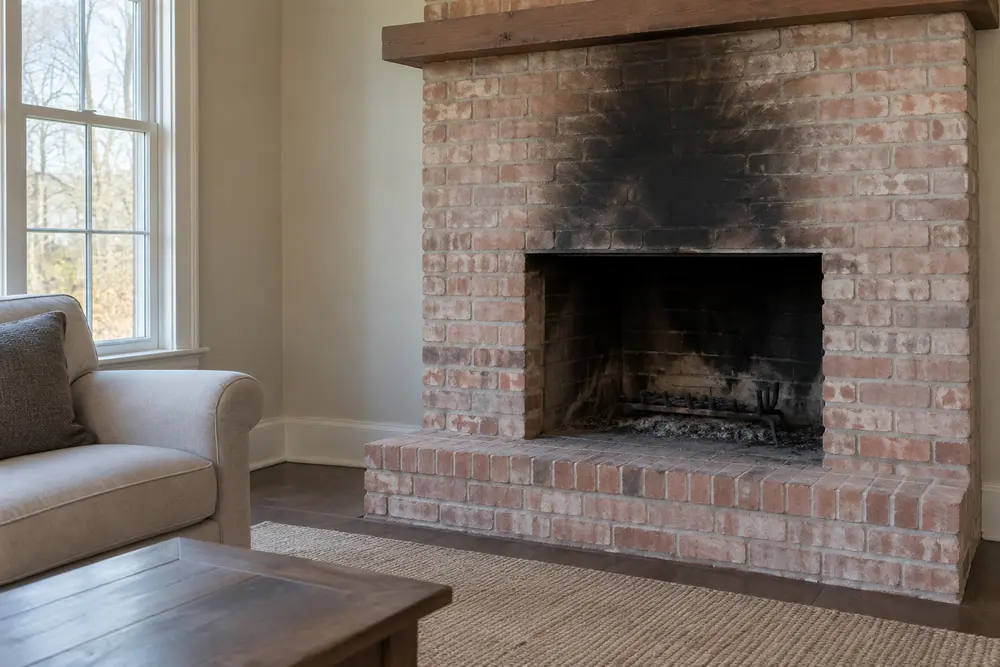
The flare-up is over, the room has aired out, and you’re staring at a black fan of soot on brick above the fireplace opening. A wet rag feels like the obvious first move. On porous brick, that quick wipe can turn loose carbon into a gray slurry that settles deeper into the face and mortar joints.
Cleaning has to come before sealing because those steps solve different problems. Remove the residue, then reassess any odor after the masonry dries. Sealing only enters the conversation when contamination remains after careful fire damage restoration and further cleaning would damage the masonry.
Mistake 1: Cleaning Before a Safety Check
A fireplace flare-up may involve more than dirty brick. Roaring or visible flames near the chimney top can indicate a chimney fire, and cleaning the surround won’t reveal whether intense heat damaged the flue system. If the event was unusually forceful, stop using the fireplace until the chimney has been evaluated. The residue itself matters as well. Powdery dry soot may release with controlled vacuuming or a dry soot sponge, while sticky deposits tend to smear when disturbed. Material left by burned plastic or finished household contents deserves more caution than ordinary wood soot and shouldn’t be treated with a random cleaner from under the sink. Location affects the cleaning method too. Brick facing around the opening can often tolerate controlled masonry cleaning, but the firebox faces direct flame and extreme heat. Because the flue is part of the chimney system, the type of chimney inspection needed depends on the event and the system’s condition. Cosmetic cleanup should wait whenever you see masonry or chimney damage.
Mistakes That Make the Stain Worse
A removable deposit becomes harder to handle when aggressive cleaning spreads it or changes the brick surface. Three popular shortcuts cause most of the avoidable trouble.
Wet Scrubbing Soot on Brick
Loose soot turns into a deeper stain when water arrives too early. Moisture combines with the carbon residue, then scrubbing drives the dirty liquid into the masonry. Mortar joints can absorb the slurry even faster than the brick face.
You can see the effect when a compact black patch turns into a larger gray halo. More scrubbing usually enlarges that halo. Loose material should first be captured with a HEPA-filtered vacuum or lifted with a dry soot sponge. Use light strokes rather than grinding residue into the surface. A household vacuum is a poor substitute because fine particles may pass through its filter and return to the room.
Wire Brushing for Faster Results
A wire brush may lighten the stain because it removes part of the brick surface along with the soot. That’s permanent damage. The bristles can scratch the fired face and leave metal fragments that later produce rust-colored marks.
The cleaned patch may then appear rougher or lighter when it dries. A clear coating won’t rebuild the missing surface. It can make the color difference more obvious by deepening the surrounding brick. The National Park Service explains that abrasive masonry cleaning can remove original surfaces and increase roughness, principles that matter even when your fireplace isn’t historic. When brushing is appropriate, use a soft nylon brush with modest pressure.
Trying Strong Household Chemicals
Acidic household cleaners can permanently alter brick color or attack vulnerable mortar joints. Bleach isn’t a dependable carbon-soot remover, and mixing household chemicals can create dangerous gases. A product that worked on bathroom tile tells you very little about how it will behave on porous fireplace brick.
Use a cleaner labeled as compatible with the masonry and the residue. Test it somewhere inconspicuous, then let that spot dry completely before judging the result. The test should reveal whether the cleaner discolors the surface or weakens the mortar. Brick Industry Association guidance emphasizes testing brick-cleaning methods and following the cleaner manufacturer’s directions. Chemical residue and contaminated rinse water must be removed before any coating is considered.
Mistake 2: Sealing Before It Is Ready
Sealer can make damp, stained brick look better for a few hours while creating a harder problem underneath. A coating applied over moisture may discolor or lose adhesion. If soot or cleaner residue remains, the sealer can lock that dirty appearance beneath a new sheen. San Antonio humidity can slow drying, especially when moisture has reached thick mortar joints. Odor provides another reason to wait. A fireplace may look clean and still smell smoky when sunlight warms the wall or the first cool-weather fire heats the assembly. That smell can come from contamination deeper within the fireplace, where coating the visible brick won’t correct it.
Choosing a sealer requires understanding what each product is designed to do. A penetrating water repellent reduces liquid-water absorption, so you shouldn’t assume it will block smoke odor. Clear film-forming products may change the sheen and affect moisture movement. Pigmented encapsulants can hide discoloration, but they change the brick’s appearance and may complicate later cleaning or repointing.
A Safer Fireplace Soot Removal Sequence
Capture Dry Residue
Effective fireplace soot removal starts by keeping dry particles from spreading beyond the work area. Protect nearby flooring and painted walls before disturbing the residue.
After the work area is protected, capture loose material with a HEPA-filtered vacuum without grinding the nozzle against the masonry. A dry soot sponge can lift the remaining powder. Rotate it to a clean surface often so you don’t redeposit soot.
Test Controlled Wet Cleaning
Controlled wet cleaning should begin only after the loose soot has been captured. Work on a small test patch with minimal liquid and a masonry-compatible product. Gentle agitation with a nonmetallic brush is usually enough to show whether the treatment works.
Following the product directions for rinsing or extraction matters because detergent left in the pores creates another residue problem. Keep the treatment confined to the test area until you know how the brick responds.
Reassess After Drying
Drying the test patch completely is necessary before you judge the result. A patch that looks clean while wet may reveal a dark ring or pale mortar later. Don’t rely only on the clock. Product requirements and actual substrate moisture should determine when you reassess the surface.
After the masonry has dried fully, evaluate whether meaningful contamination remains. A faint gray ghost stain can persist even after removable soot is gone, and that alone doesn’t always justify more abrasion. Persistent smoke odor carries more weight because it can point to residue below the surface or beyond the surround.
What to Watch for Before the Next Fire
Sealing is justified only in limited cases. The remaining contamination should be too deeply embedded to remove without harming sound masonry, and the chosen product must match the expected heat exposure. Test adhesion and appearance first. Ordinary clear sealers and household paints don’t belong inside a firebox unless the manufacturer expressly approves them for refractory masonry and direct high-temperature use. Properly cleaned firebox masonry is often best left uncoated. When the weather cools and you’re preparing to use the fireplace again, pay attention to any smoky odor that returns as the brick warms because it suggests unresolved contamination. Fresh structural damage or new black deposits can indicate a chimney or combustion problem. Stop using the fireplace if you notice those signs, especially after a forceful flare-up. If soot contamination extends beyond the fireplace or keeps producing odor after cleaning, request an estimate before applying a sealer. That next check can help determine whether you’re seeing stubborn residue or damage that needs attention before fireplace season.
References
- testing brick-cleaning methods (gobrick.com)