That drip from your bathroom fan is not a spooky attic ghost. It is your warm shower air smacking into an ice-cold duct, condensing into water, and then raining back onto your drywall like a tiny indoor monsoon. Bathroom fan condensation ruins paint, feeds mold, and soaks insulation, and if your fan is venting into the attic or running through a long, uninsulated duct, you are basically sponsoring mold’s all-you-can-eat buffet. The fix is not rocket science. You need insulated exhaust ducting, a proper slope to an exterior hood, a tight backdraft damper, and a fan that runs long enough to clear the moisture. Here is how to stop the drip-show fast and keep your ceiling dry for good.
Why Your Bathroom Fan Is Dripping on Your Ceiling
Warm, moist shower air loves to condense on cold surfaces. When that air rides a long duct through your unconditioned attic, the metal or plastic walls are cold, the air cools, the dew point gets crossed, and boom, you have water. If the duct is uninsulated, the cooling is rapid and relentless. If the duct is flat or has low spots, condensate puddles inside the pipe. Eventually gravity wins and that water drains back into the fan housing or onto the drywall seam beside it. That is the drip you are seeing, and it is the same moisture that can feed mold on your roof sheathing, rust nails, and mat down attic insulation.
The mess gets worse when the fan is off and cold exterior air sneaks in through a sloppy damper. That backdraft turns your duct into a chilled thermos, so the next steamy shower condenses even faster. Pair that with a fan that shuts off right when you step out, and moisture hangs around long enough to create a little indoor rainforest inside your duct. Moisture, time, and a food source is the mold recipe. Do not hand it the mixing bowl.
The Usual Suspects Inside the Duct
Here is where most bathroom fan condensation problems start. First, venting into the attic instead of outside is a direct violation of good building practice and often code, and it is a guaranteed way to grow fuzzy science experiments on rafters and roof decking. Model codes require bathroom exhaust air to discharge outdoors, not into attics or crawlspaces. Inspectors see the fallout all the time, from stained sheathing to soggy insulation that has lost its R-value. Second, long runs of uninsulated duct in an attic will bleed heat out of that humid air, so moisture rains out inside the pipe. Third, sloppy routing with dips and sags creates perfect little bathtubs inside the duct, and those fill with water that eventually dumps back into your bathroom.
There is a fourth suspect that gets ignored: bad dampers. Many fans come with a flimsy flap that barely closes. Without a tight backdraft damper near the exterior hood, cold air rides the duct like a freight train back toward the fan. That cools the duct walls and sets you up for the next round of condensation. If the fan also shuts off too soon, the steam you created will just sit in the duct and condense while you are toweling off. That is not ventilation, that is a trap.
What Code and Best Practice Say
Model codes like the IRC and IMC require bathroom exhaust to terminate outdoors through dedicated equipment that prevents backdrafting and water intrusion. Discharging into attics, soffits that feed the attic, or crawlspaces is not allowed. Many local codes also call for insulation on exhaust ducts that run through unconditioned spaces, commonly R-8. Home inspection organizations routinely document attic damage from bath fans that dump into roof cavities or run through bare ducts. Industry resources also recommend sloping the duct so condensate drains out at the hood rather than back toward the fan. A run-on timer or humidity control is widely encouraged so you actually clear moisture from the room and the duct after showers.
If you want to see the risks and prescriptions in black and white, home inspector and builder resources cover them in detail. InterNACHI explains how uninsulated ducts condense and sweat in attics. ASHI lays out routing, insulation, and damper placement. Fine Homebuilding tackles slope, insulation, and timers. Inspection Time TX breaks down the structural and health risks from attic venting and poor terminations. There are no prizes for reinventing this wheel. The pros are aligned on how to do it right.
Fix It Right Now
You can solve bathroom fan condensation with a handful of proven moves. The goal is simple: exhaust moist air outside through insulated exhaust ducting that slopes to an exterior hood, keep cold air out with a tight damper, and keep the fan running long enough to dry the duct after every shower. Here is how that looks in the real world.
Inspect What You Have
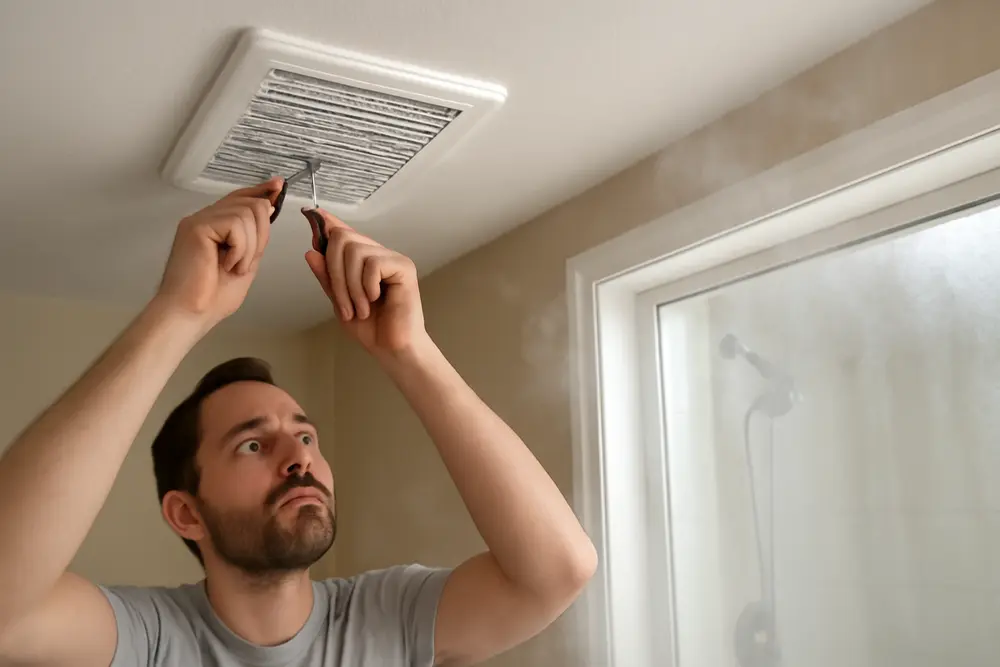
Pull the fan grille and check for water streaks inside the housing. In the attic, track the duct from the fan to where it ends. Does it actually terminate outside at a roof cap or wall hood, or does it disappear into insulation or a soffit vent? Is the duct bare and frosty in winter? Are there sags or awkward loops? Is there an exterior damper at the termination, and does it shut tight? Jot notes and snap photos, because you are about to correct everything that screams condensation factory.
Route to the Outdoors
If the duct does not terminate outside, fix that first. Your choices are a roof cap or a wall hood that is rated for bath exhaust. Keep the run as short and straight as possible. Terminating at the soffit is rarely a good idea because the air often gets sucked right back into the attic. The exterior cap should include a damper and a screen that is easy to clean. Follow the manufacturer’s instructions for flashing and sealing the cap to the roof or wall to prevent leaks. If you are not comfortable making a roof penetration, hire a qualified contractor. One good hole in the right place beats ten buckets catching drips in the wrong place.
Choose the Right Duct
Rigid or semi-rigid metal duct moves air better and resists sagging, which means fewer condensation traps. Flexible duct is allowed by many jurisdictions, but if you use it, keep it pulled tight and fully supported every few feet so it does not belly out. Use the diameter the fan is rated for, typically 4 to 6 inches. Reducing diameter to squeeze through a tight spot just increases resistance and invites moisture to linger. If you have to use a couple of elbows, use smooth, large-radius fittings instead of crimped, sharp turns. Air likes lazy curves, not hairpins.
Give It a Steady Slope
Run the duct with a continuous downward pitch toward the exterior hood so any condensate drains outside. Avoid flat runs and never let the duct dip into a low spot. A safe target is about a quarter inch of drop per foot of run. That does not have to be laser perfect, but it has to be obvious to the eye and continuous. Support the duct so the slope cannot sag over time. If you are coming off the fan horizontally, elevate the fan end slightly or use a short riser before turning toward the exterior so gravity always helps you, not fights you.
Wrap It With Real Insulation
Through unconditioned space, you want insulated exhaust ducting, not bare pipe pretending it is fine. If you use rigid or semi-rigid duct, sleeve it with duct wrap that delivers at least R-8 in cold climates and follow local code. If you use insulated flex duct, verify the insulation rating and keep the inner liner stretched smooth while the insulation stays fluffy. Tape and strap do not count as insulation. The whole run in the attic needs to be insulated, including elbows. This is what keeps the humid air warm enough to exit before it condenses.
Seal Every Joint
Every connection, seam, and collar should be sealed with UL 181 foil tape or rated mastic. Not cloth duct tape. Mastic or foil tape makes the system air tight so moist air actually goes outside instead of leaking into the attic at every joint. At the fan housing, use the correct adapter and screws, then seal the collar. Do the same at the exterior cap connection.
Add a Tight Backdraft Damper
Use a high quality in-line or at-cap damper that actually closes, then pair it with the integral damper on many fans. The goal is a double stop that limits cold air sliding back through the pipe when the fan is off. Place the additional damper near the exterior end so the outside air is stopped before it chills the whole run. Test it by turning the fan off and feeling for drafts at the grille. If your damper clangs in the wind or sticks open, upgrade it.
Install a Run-On Timer
Add a timer switch or a humidity sensor control so the fan runs after you leave the bathroom. A solid rule is about 20 minutes of run time after a shower. That extra runtime clears moisture from the room and the duct so it cannot condense in place. Humidity sensing controls are great for kids and guests who think the switch is decoration. Set the sensor to trigger at a reasonable relative humidity, then let it do its job. If your fan is undersized, consider upgrading to one with a higher cfm rating so it can actually move the moist air out.
Air-Seal the Fan Box and Insulate Right
In the attic, air-seal around the fan housing cutout with caulk or spray foam so warm bathroom air cannot bypass the fan and leak straight into the attic. If your fan is IC-rated, you can bury the housing in insulation per the manufacturer’s instructions. If it is not IC-rated, maintain the clearance the manufacturer specifies and consider upgrading the fan to an IC-rated unit. Leaky housings and bare tops are attic moisture magnets.
Test the Performance
Do a simple tissue test at the grille with the fan on. The tissue should stick firmly. At the exterior cap, confirm strong airflow and watch the damper open. After your next hot shower, leave the fan running on the timer and check the attic duct later. No drips, no sweat on the insulation jacket, and no pooling noises means you nailed it.
| Wrong | Do This Instead |
|---|---|
| Vents into attic or soffit intake | Terminate at a roof cap or wall hood outdoors |
| Long, bare duct in attic | Insulated exhaust ducting with R-8 wrap |
| Flat runs with dips and bellies | Continuous slope toward exterior, well supported |
| Loose, leaky joints with cloth tape | Foil tape or mastic at every seam and collar |
| Flimsy damper that sticks open | Quality backdraft damper near exterior cap |
| Fan shuts off when you step out | Run-on timer or humidity sensor control |
Pro Details That Separate Wins From Woes
Keep the run short. Every foot of duct and every elbow increases resistance, which keeps moisture hanging around. Use smooth-wall duct whenever you can because ridges in flex duct collect condensate and slow airflow. Support flex duct every 4 feet at least, and more often if it wants to sag. Pick an exterior cap with a damper that is balanced and quiet, then mount it so the flap can move freely without binding against siding or shingles. In snow country, avoid terminating where snow piles up and locks the damper shut. In hot-humid climates, insulation is not optional. In cold climates, insulation is not optional either. If your attic sees temperature swings, you want that whole run jacketed.
Consider fan sizing and noise. If your bathroom is 50 to 100 square feet, many codes accept a 50 to 80 cfm fan. For bigger bathrooms or those with enclosed toilets, step up to 100 cfm or more. A whisper-quiet fan is nice, but quiet only counts if it actually moves air. Look for a fan with a good balance of cfm and sones. Finally, keep the grille and fan wheel clean. Dust reduces airflow and efficiency, which keeps moisture riding the duct longer than it should. A two-minute vacuum session a couple times a year is cheap prevention.
Common Myths To Ignore
Myth one: venting to the attic is fine because the attic is already ventilated. Wrong. You are dumping shower steam directly into wood and insulation. Attic vents will not save you from condensation raining off cold sheathing. Myth two: flex duct is always fine because it is easy. It is fine when installed tight, straight, supported, insulated, and sloped. When it snakes around like spaghetti, it is a water trap. Myth three: a screen on the soffit is an acceptable termination. That air often recirculates right back into the attic. Myth four: if the grille is wet, just caulk around it. The ceiling stain is a symptom. Fix the duct, damper, slope, and runtime, or the stain will be back with friends.
What If You Already Have Stains or Mold?
Stop the moisture source first. Correct the duct routing, insulation, slope, and damper, then set a run-on timer. Next, inspect the attic. If insulation is wet, pull it back and let the cavity dry. Replace insulation that is saturated or matted. Stained roof sheathing or framing needs assessment. Light surface growth can often be cleaned and treated once the attic is dry and the source is fixed. If you see widespread growth, crumbling wood, or a musty blast that makes your eyes water, call a restoration pro. We handle this exact mess daily, and catching it early saves money and lumber. Inside the bathroom, cut out any drywall that is swollen or crumbling, dry the cavity, and reinstall with proper air sealing at the fan housing.
FAQ
How Much Should The Duct Slope?
A steady downward slope toward the exterior is the goal. Roughly a quarter inch per foot is a solid target. The key is no flat runs and no low spots. Support the duct so the pitch does not sag over time.
Do I Really Need Insulated Exhaust Ducting?
Yes if any part of the duct runs through unconditioned space like an attic or crawl. Insulation keeps the moist air warm long enough to reach the exterior hood before it condenses. Many local codes call for R-8 on ducts in attics. Bare metal in a cold attic is a condensation machine.
Can I Vent Through a Soffit?
Only if you use a direct-vent soffit hood that does not discharge into the attic and is located so the air does not get drawn back into roof vents. In most homes, a wall hood or roof cap is a better, cleaner option that avoids recirculation.
How Long Should The Fan Run After a Shower?
About 20 minutes. A timer or humidity sensor switch makes this automatic. The goal is to clear moisture from the room and the duct so it does not sit and condense later.
What Size Fan Do I Need?
Match cfm to room size and layout. Small baths often need 80 cfm. Larger rooms or ones with separate toilet rooms should step up to 100 cfm or more. Bigger tubs and steamier habits also argue for more airflow. A properly sized fan that is actually used is miles better than a quiet fan that never turns on.
What Tape Should I Use On The Duct?
Use UL 181 foil tape or rated mastic on all seams and joints. Cloth duct tape dries out and fails. Seal every collar at the fan and exterior cap for a tight system.
Sources and Further Reading
Inspecting Uninsulated Exhaust Ducts in the Attic by InterNACHI explains why cold ducts sweat and how to address it: nachi.org. Bath Fan Venting Issues from ASHI walks through best routing, insulation, and damper practices: homeinspector.org. How To Prevent Bath-Fan Condensation from Fine Homebuilding covers slope, insulation, and run-on timers: finehomebuilding.com. Bathroom Exhaust Fans Venting Into the Attic: 5 Serious Risks outlines structural and health concerns if you do it wrong: inspectiontimetx.com. For a code-focused explainer on why bathroom exhaust must discharge outdoors, see: prked.com.
When You Should Call a Pro
If you find rotted sheathing, widespread mold, or a duct route that requires cutting into the roof or exterior wall you should not guess your way through, call a qualified contractor. As a restoration company, we see the aftermath of bathroom fan condensation every week. Fixing the moisture path with insulated exhaust ducting, a clean slope, a proper exterior hood with a real damper, and a run-on timer costs a fraction of tearing out moldy drywall, replacing insulation, and treating attic framing. If you want an expert set of eyes, we will inspect, correct the duct path, and remediate any damage that has already started. Your shower should not end with a ceiling drip. Let’s make sure it never does.