Dryer vent condensation is the soggy little secret behind mysterious ceiling stains, mushy drywall, and that musty attic funk you swear wasn’t there last summer. Your dryer pumps out hot, humid air every cycle. If that air slows down, cools off, or never makes it all the way outside, the water vapor turns to liquid and starts raining inside your walls and attic. The fix is straightforward if you tackle routing, materials, and maintenance the right way. Let’s stop the sweating, keep your attic dry, and avoid turning your vent line into a lint-fueled hand warmer.
Why Your Dryer Vent Is Sweating
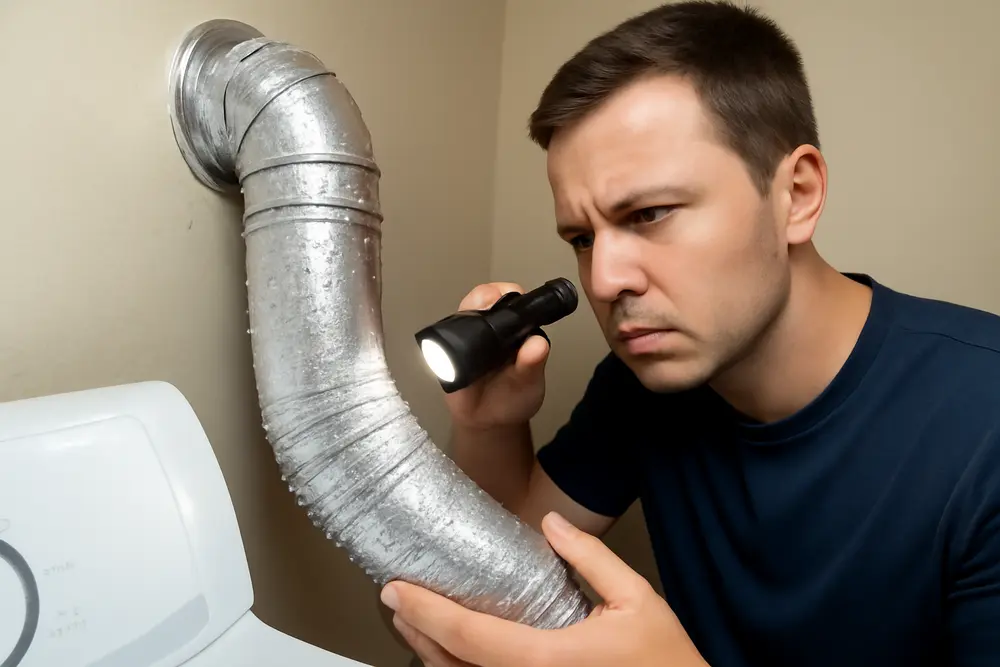
Dryers move a lot of moisture. A typical load can release around a gallon of water that needs to go outside as vapor. If that moist air hits cold surfaces inside your wall or attic, it condenses and drips. That is dryer vent condensation in action. The usual suspects are long or twisted duct runs, uninsulated sections running through cold spaces, sagging lines that puddle, and flimsy foil or plastic flex that chokes airflow.
Warm, wet air is like a ride-or-die friend for condensation. Send it through a cold attic or an exterior wall with little insulation, and it sheds water onto whatever it touches. The longer the run and the more elbows you add, the faster the air cools. Add in flexible foil that ripples like a corrugated road, and you increase friction so the vapor lingers and drops water inside your building. That water often hides in insulation and behind drywall where it quietly builds a mold condo.
If you want the official take on how dryers should move air, check home inspection standards and building science guidance. They all agree: rigid metal duct, short run, minimal bends, and a direct path to the outdoors. See the home inspection standards for dryer vents and the proper clothes dryer venting guidelines for the details.
The Hidden Damage It Causes
Moisture in walls and attics does not just evaporate and move on. It soaks insulation, feeds mold, stains ceilings, rots framing, and corrodes nails and fasteners. Fiberglass insulation loses R-value when it gets damp, which makes that outside wall or attic colder and your condensation problem worse. You also pay more to dry a load because the dryer is basically pushing uphill against a soggy duct.
Then there’s lint. Lint collects inside rough or sagging ducts, catches on screws, and sticks to screens on exterior hoods. Lint is extremely flammable. Restrict airflow and your dryer runs hotter and longer. Mix that heat with lint and you have an unwanted science experiment in combustibles. That is why codes ban plastic or foil non-metallic dryer ducts in concealed spaces and require smooth metal ducting. Good airflow is not just about runtime and efficiency. It’s about not inviting a dryer fire.
Route The Vent The Right Way
The shortest, straightest path to the exterior wins. Dryers are not power ventilators. They are small blowers meant to push warm, moist air through a few feet of smooth pipe. If your duct snakes across the laundry, up a wall, across an attic, then down a soffit, you have set the stage for condensation and lint clogs.
Plan your route like this:
Keep the run as short as possible and minimize elbows. Every elbow slows the air and adds equivalent length. Many codes and best practices set a base maximum of 35 feet of smooth 4 inch metal duct, then subtract for bends. The exact allowance depends on your dryer manual, but this common rule of thumb keeps homeowners out of trouble. If you are re-routing, move the dryer or punch a shorter route to the outside to stay under that limit.
| Duct Feature | Equivalent Length To Subtract |
|---|---|
| Base maximum for 4 inch smooth metal duct | 35 ft |
| Each 90 degree elbow | 5 ft |
| Each 45 degree elbow | 2.5 ft |
Example: A 25 foot run with two 90s equals 25 + 5 + 5 = 35 feet. You’re at the limit. One more bend or a ripple of flex duct and you’ve tipped into trouble. Check your model’s installation guide and compare to the proper clothes dryer venting guidelines to be safe.
Build in a slight downward pitch toward the exterior termination on horizontal runs so any incidental condensation drains out instead of pooling. Keep the line straight and tight with no dips. If the vent must run up, eliminate sags and insulate those sections so the air stays warm and moves out fast.
Use Insulated Rigid Dryer Duct
This is where most dryer vent condensation problems start. If your duct is plastic or thin foil flex, replace it. Codes prohibit plastic and most foil ducts in concealed spaces because they trap lint, tear, and melt. Use 4 inch rigid or semi-rigid metal duct with a smooth interior. Galvanized steel or aluminum are common and affordable.
If the duct passes through a cold space like an attic, crawlspace, or an exterior wall cavity, wrap it with duct insulation. Insulation keeps the exhaust warm enough to remain vapor until it exits outside. Warmer air carries moisture better than cold air. The insulated rigid dryer duct setup wins twice: less condensation and better airflow. A foil-faced R-6 sleeve or similar duct wrap works well when properly taped and sealed. Do not bury uninsulated dryer duct in blown-in insulation and hope for the best. Warm moist air will still hit cold metal and condense inside.
Where the dryer connects to the wall, use a short UL 2158A listed transition duct. Keep that transition as short and as straight as possible and never conceal it inside walls or floors. The bulk of the run should be rigid or semi-rigid metal, not flex. Support it so it does not sag, and protect it where it passes studs or joists with proper collars and fire-safe framing techniques per local code.
Terminate It Correctly Outside
Dryer exhaust must go outdoors. Not into the attic. Not into a crawlspace. Not into the garage. If it is not rewarded with fresh air and daylight, it will condense and dump water inside the structure. The exterior termination needs a proper hood with a backdraft damper that opens when the dryer runs and shuts when it stops. Do not install a screened cap. Screens trap lint and clog, and they violate most codes for dryer vents.
Place the termination at least 12 inches above finished grade and generally at least 3 feet from doors, windows, and mechanical air intakes. If you are penetrating a wall or roof, flash it correctly and seal the exterior with high quality sealant. On roof terminations, use a dryer-rated roof cap with a damper designed for lint. Side wall terminations are usually better for airflow and maintenance, but either can work if done right. The big rule is direct to outside with no screens and a working damper, as specified in resources like the state field guide for dryer venting to the exterior.
Seal, Support, And Test
Sealing and supporting the duct is the difference between a clean run and a lint farm. Tape joints with UL-listed foil HVAC tape. Skip fabric duct tape since it dries out and falls off. Avoid using sheet metal screws that protrude into the airflow, because they catch lint. Where you need mechanical fastening, use smooth band clamps and then tape over the joint. Hang or strap the duct every 4 to 6 feet so it cannot sag and collect water.
After install or repairs, test it. Run the dryer on air fluff and check outside. The damper should open fully and you should feel strong airflow. If you need a quick sanity check, hold a tissue near the hood to see if it blows briskly outward. Inside, listen for rattling that suggests a loose joint. If airflow seems weak, go hunting for crushed sections, kinks, or a hidden elbow that snuck into the design. You can also remove the transition duct at the dryer and feel for strong exhaust. Weak at the dryer usually means the appliance or lint screen is the issue. Weak at the far end means the duct path is the problem.
Maintenance That Actually Works
Even a perfect install needs cleaning. Lint builds up in every system. Clean the dryer vent at least once per year and more often if your run is long or your household does a lot of laundry. A quarterly clean is smart for large families and rentals. Remove the transition duct, brush the lint channel at the dryer, and run a rotary brush or vacuum from the interior and exterior end until the brushes come out relatively clean. Confirm the exterior hood moves freely and the damper closes when the dryer is off.
Between deep cleans, empty the lint filter after every load and occasionally remove and wash it with warm water and a bit of dish soap to remove fabric softener residue. Inspect visible duct sections for dents or kinks after moving the dryer for cleaning or remodeling. Keep the area behind the dryer free of clutter so boxes or storage do not crush the transition duct.
Signs you need to act: dry time is creeping up, clothes feel hotter than usual when the cycle ends, the laundry room feels humid, or there is a burning smell. Any of those mean you should stop and inspect before you turn laundry day into call-the-fire-department day. For general timelines and routines, see maintenance takes like how often to clean a dryer vent.
Already Seeing Moisture Damage?
If your ceiling looks like a Rorschach test or you are finding damp insulation in the attic, pause the dryer and triage. Pull the exterior hood and check for lint mats or stuck dampers. If the duct runs through an attic, open a section of the insulation channel and look for water staining on the duct or framing. On interior walls, a moisture meter is helpful. No meter handy? A small inspection hole near the suspected wet area can confirm conditions and save you from tearing out an entire wall later.
Dry what you can quickly with targeted airflow and a dehumidifier. If you have mold or prolonged wetting, remove impacted drywall and any insulation that stayed wet longer than 24 to 48 hours. Mold needs food and moisture, and wet paper-faced drywall is a buffet. Once the area is open, fix the vent path properly with insulated rigid dryer duct, then dry the cavity to normal moisture content before you close it. If you are unsure how far the moisture traveled, bring in a restoration crew that actually maps moisture, removes what cannot be dried, and documents the dry standard before rebuild. That is how you avoid doing this twice.
Quick Specs And Code Notes
Here is the fast version of what your setup should look like, based on common code and building science references:
Use 4 inch rigid or semi-rigid metal duct with a smooth interior. Plastic or foil flex in concealed spaces is a no-go. A short UL 2158A listed transition duct is allowed between the dryer and the wall, but keep it short and fully visible.
Keep the equivalent length within the manufacturer’s limits. If your manual is missing, the long-standing baseline is 35 feet for 4 inch smooth metal, minus 5 feet for each 90 degree elbow and 2.5 feet for each 45 degree elbow. Fewer bends is always better. If the run must go through unconditioned space, wrap with duct insulation to limit cooling and condensation.
Terminate outside with a dampered hood and no screen. Keep it at least 12 inches above finished grade and about 3 feet from doors or windows. Seal and flash the penetration properly. The goal is clean airflow out, no rain or pests in.
Seal joints with foil HVAC tape and use band clamps rather than screws that penetrate the airstream. Support the run so it stays straight with no dips. Test airflow at the outside hood after installation and after every cleaning.
If you want the playbook in black and white, cross-check with home inspection standards for dryer vents and these proper clothes dryer venting guidelines. For routing and exterior details, this field guide to venting dryers to the exterior is also helpful.
FAQ: Dryer Vent Condensation
Why is water dripping from my dryer vent line?
Because warm, moist exhaust hit a cold surface somewhere in the run and condensed to liquid. That usually means a long or poorly insulated route, flex duct that slowed the air, or a clogged termination hood. Fix the airflow and the temperature difference, and the dripping stops.
Should I insulate my dryer duct in the attic?
Yes. If any part of your duct crosses an unconditioned space like an attic, crawlspace, garage, or exterior wall, wrap it with duct insulation. Insulation keeps the exhaust warm and limits condensation. Pair insulation with rigid metal duct for the best results.
Can I vent my dryer into the attic or garage to keep heat in?
No. Dryer exhaust must go directly outdoors. Dumping warm, wet air into a building cavity is a recipe for mold and structural damage. It is also a code violation.
Is foil or plastic dryer vent hose safe?
Not for concealed runs. Plastic and thin foil hoses trap lint, tear easily, and cannot handle heat the way metal does. Use 4 inch rigid or semi-rigid metal duct for the permanent run and keep the transition flex short, visible, and UL 2158A listed.
What is the maximum dryer vent length?
Many setups follow a 35 foot maximum for 4 inch smooth metal duct, minus 5 feet for each 90 degree elbow and 2.5 feet for each 45. Your dryer manual controls, and some models allow more or less. Keep the run as short and as straight as possible regardless of the listed max.
How often should I clean the dryer vent?
At least once per year. Clean more often if you do heavy laundry, your run is longer or has several elbows, or you notice longer dry times. Always clean the lint filter after each load.
Can I use screws to connect my dryer duct?
Avoid screws that protrude into the airstream. They snag lint. Use smooth band clamps and seal joints with foil HVAC tape for an airtight and lint-resistant connection.
Do I need a screen on the exterior vent to keep pests out?
No. Screens clog with lint and are not allowed on dryer vents. A proper dryer vent hood with an integral damper keeps most pests out and lets lint escape freely.
Will a booster fan solve a long run?
Sometimes, but it is better to shorten and straighten the run. If a booster is the only option, it must be listed for dryer exhaust and installed per the manufacturer so it can be serviced. Many homes do not need a booster when the route is designed correctly from the start.
How can I tell if my dryer vent termination is working?
When the dryer runs, the damper should swing open completely and you should feel strong airflow outside. If it barely opens or the flow is weak, there is a restriction. Check for lint at the hood, crushed duct behind the dryer, or a clogged section in the run.
Want Help That Does Not Cut Corners?
If you are dealing with soaked insulation, attic mold, or a vent line that looks like a roller coaster, this is fixable. We reroute vents with insulated rigid dryer duct, set proper terminations, and clean out years of lint so you stop wasting energy and risking fire. If hidden moisture has already made itself at home, we also handle the drying, mold-safe removal, and rebuild. One visit, one crew, no nonsense. Reach out and we will make your dryer exhaust boring again, which is exactly how you want it.