Your toilet is not crying. That sweat on the tank and those drips under your sink are just physics with a bad attitude. Warm, humid air hits a cold surface, and boom, your bathroom becomes a DIY rainforest. The problem is, that harmless-looking “sweat” can rot cabinets, buckle subfloors, and feed mold in places you really don’t want mold. If you’ve ever asked why your toilet looks like it just finished hot yoga, or why the cold-water line under the kitchen sink keeps raining inside the cabinet, you’re in the right place. Let’s stop the leaks that aren’t leaks and keep your home from quietly dissolving.
What Causes Toilet Tank Sweating?
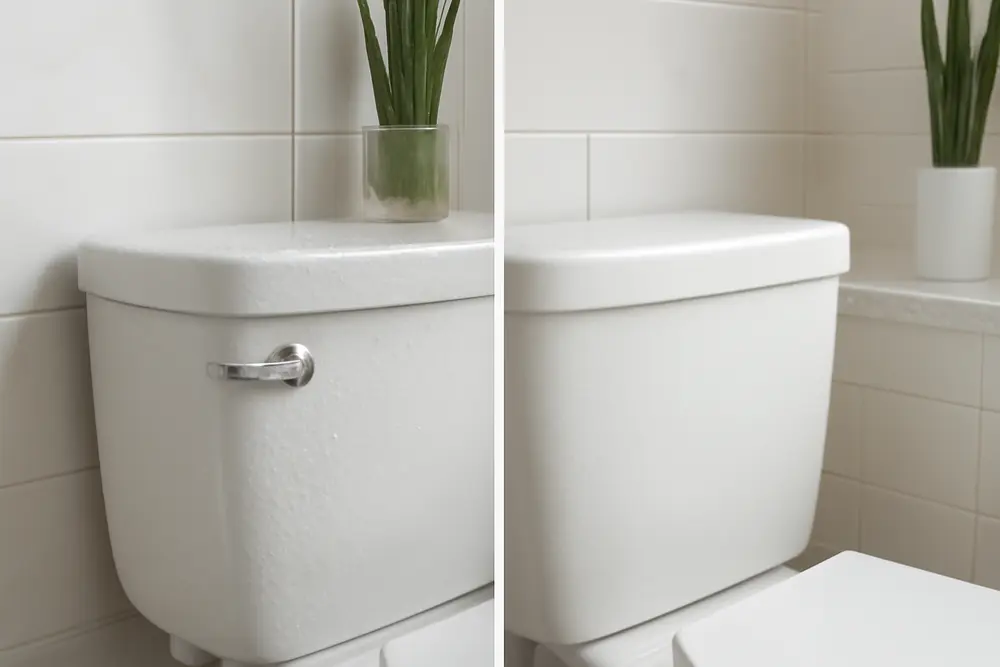
This whole circus is condensation. When warm, moisture-heavy air meets a surface that’s colder than the air’s dew point, the water in the air condenses on that surface. Your toilet tank is filled with cold refill water, usually around 50 to 60 degrees. The porcelain gets cooled by that water, then the room’s humid air condenses on the tank. Same story for bare cold-water pipes. If you’ve got hot showers, poor ventilation, or already-humid summer air, you’ve basically created the perfect storm for toilet tank sweating and pipe condensation.
Here are the usual accomplices that make the sweat even worse:
Running toilets keep pulling in fresh cold water nonstop, which keeps the tank cold. A leaky flapper or lazy fill valve can turn your tank into a refrigeration unit. Lack of ventilation lets humidity sit around like an unwanted houseguest. And kitchens aren’t innocent either. Ice-cold water lines under sinks will sweat like gym bottles, especially when the dishwasher runs or you’re cooking pasta and steaming up the place.
Want to go full nerd for a second? Your goal is to keep cold surfaces above the dew point of the room air, or bring the dew point down by reducing humidity. Do either one and condensation can’t form. That’s the whole game.
Why It Wrecks Cabinets And Floors
Condensation is sneaky. It doesn’t gush like a burst pipe. It quietly drips, wicks into wood, bleeds into drywall, and sits there long enough to start the slow rot. We see it constantly: swollen cabinet bottoms, peeling veneer, buckled vinyl near the toilet base, soft subfloors around the flange, and baseboards with mystery stains that are definitely not from mop water. Give moisture a little time and you’ll also get that musty “old gym bag meets wet towel” perfume. Mold and mildew absolutely love the shaded, damp real estate under a sink or behind a toilet. Once they move in, you’re dealing with indoor air quality issues and potential repairs that make your wallet cry real tears.
If you’re already spotting discoloration, soft spots, or a lingering odor, hit pause and take a closer look. Hidden water issues often show up in more than one place. Here’s a useful resource on tracking them down: How to Detect Hidden Water Leaks.
Quick Fixes You Can Do Today
Start with the low-hanging fruit before grabbing tools and cracking walls. First, stop the toilet from running. Drop a few drops of food coloring in the tank. If it shows up in the bowl without flushing, your flapper is leaking. A new flapper or fill valve is cheap and takes minutes to install. Fewer refills mean a warmer tank and less condensation. Next, actually use the bathroom exhaust fan. Run it during showers and for 15 to 20 minutes afterward. That extra run-time clears humid air instead of letting it marinate. If your HVAC is on, let it run while you shower. Air conditioning dehumidifies as it cools, and even a portable dehumidifier helps a ton in sticky months. Wipe down the tank during the worst humidity spikes to keep drips from puddling on the floor or soaking into baseboards.
If you’ve got under-sink pipe sweat, clear out the cabinet clutter to allow airflow and prop the door open after cooking or dishwashing. The extra ventilation helps the pipes dry out faster instead of letting droplets run along the lines and soak the cabinet floor.
Permanent Fixes That Work
When you’re ready to stop babysitting your bathroom, these solutions actually solve the problem. Some are DIY friendly. Some are best left to a plumber. All of them target either the cold surface or the humidity in the air.
| Fix | What It Does | What To Know |
|---|---|---|
| Anti-sweat valve | Mixes a small amount of hot water with the cold refill line to raise tank water temperature so the tank exterior is not so cold. | Extremely effective for chronic toilet tank sweating. Needs plumbing access and hot water nearby. Once set, it’s hands-off. |
| Tank insulation | Foam or EPS liner inside the tank reduces heat transfer from cold water to porcelain. | DIY friendly and affordable. Not always enough alone in high humidity or with frequent flushing. |
| Insulate cold pipes | Foam sleeves on exposed cold-water lines reduce the chilling effect and stop droplets from forming on pipe surfaces. | Cheap, fast, and effective. Focus on toilet feed lines and under-sink piping. |
| Humidity and ventilation | Lower the dew point so condensation can’t form even on colder surfaces. | Use a quality exhaust fan, AC, or a dehumidifier. Keep indoor RH under 50 to 60 percent. |
| Fix leaks and run-on | Stops constant cold-water refills that supercool the tank. | Always check first. A new flapper or fill valve often solves the issue by itself. |
| Insulated tank or new toilet | Some models include built-in insulation to prevent tank sweat. | Higher cost up front, but a permanent solution if other steps fall short. |
Step-By-Step: Add A Tank Liner
If your tank sweats seasonally or after showers, a liner kit can be a smart DIY fix. Here’s the clean way to do it without turning your bathroom into a foam confetti party.
- Shut off the toilet’s water supply and flush to empty the tank. Sponge out the last inch or two to get it bone dry.
- Clean the inside walls with a non-oily cleaner. Rinse and dry completely. Adhesive hates dust and moisture.
- Dry-fit the foam panels so you know what goes where. Mark around hardware and trim where needed.
- Apply the adhesive per the kit instructions and press panels in place. Work methodically to avoid gaps.
- Let the adhesive cure fully. Do not rush this. Moisture will ruin a half-cured job.
- Restore the water supply, check for any interference with the flapper or fill valve, and flush-test.
Pro tip: If your tank hardware is old or crusty, replace the flapper and fill valve while you’re in there. Nothing like fresh internals to keep refills smooth and quiet.
Pipe Condensation Prevention In Kitchens
Bathrooms get all the press, but kitchens lose a lot of cabinets to pipe sweat too. If the cold-water line under your sink looks like it just ran a marathon, here’s how to fix it. Insulate every inch of exposed cold pipe you can reach using closed-cell foam sleeves. Cut cleanly around unions and valves so you can still inspect for leaks. Do not smother the shutoff valve or trap. If you have a filtered water system or fridge line teeing off under the sink, insulate those cold runs as well. Improve airflow under the cabinet by not stuffing it like a suitcase. Install small louvered vents on cabinet doors or leave the doors cracked after running hot water or the dishwasher. If your kitchen is chronically humid, a small, quiet dehumidifier parked nearby during sticky months works wonders.
Humidity And Ventilation That Actually Help
The magic number is indoor relative humidity under 50 to 60 percent. That keeps the dew point low enough to stop tank and pipe sweat in most homes. Use a hygrometer to check the space. If your bathroom fan is more decorative than functional, upgrade it. As a baseline, you want 50 cfm minimum for small bathrooms and about 1 cfm per square foot for larger rooms. Put the fan on a 15 to 30 minute timer so it keeps clearing steam after you leave. Make sure the door has at least a 3/4 inch undercut so make-up air can get in while the fan is running. Exhaust should terminate outside, not into an attic or crawlspace. In summer, run the AC during showers to knock humidity down. In basements or homes without central air, a standalone dehumidifier targeting 45 to 50 percent RH is your friend.
If you want more on why controlling humidity also keeps mold from turning your bathroom into a petri dish, check this out: Humidity & Mold: How Your Home’s Climate Could Be Making Mold Worse.
Anti-Sweat Valves: Why They’re So Good
If your toilet lives in a humidity-prone room or you’ve tried everything and the tank still sweats, install an anti-sweat valve. It blends a small amount of hot water into the toilet’s cold supply so the refill water is closer to room temperature. That slight bump is often all it takes to stop condensation entirely. These valves are adjustable and get set once. They are safe for your toilet, and no, they will not turn the bowl into a hot tub. The mix is minor and just enough to lift the tank temp out of the sweat zone. You will need access to a nearby hot water line or to run one. This is typically a job for a licensed plumber, especially if walls need to be opened. For a deep primer on the concept, here’s a helpful overview from a trusted source: Bob Vila on toilet tank sweating.
Preventive Checks That Save Money
Put these on autopilot and you’ll avoid 90 percent of condensation damage. Test the flapper quarterly with the food-coloring trick and replace it if the color bleeds into the bowl. Peek under bathroom and kitchen sinks monthly. If you see beads on cold lines or damp cabinet floors, insulate and ventilate. Clean your bath fan grille twice a year and verify it actually pulls tissue paper when running. Keep a $10 hygrometer in the bathroom and aim for under 60 percent RH. If humidity spikes, run the fan longer, kick on AC, or use a dehumidifier. During the muggiest months, wipe down the toilet tank once a day if needed. It sounds simple, but keeping drips off the floor prevents a lot of trouble.
Are You Seeing Hidden Damage?
Check these red flags. Spongy flooring around the toilet. Caulk lines pulling away from baseboards. Yellowed paint or bubbling drywalls behind or beside the toilet. Warped cabinet bottoms under the kitchen sink. Musty odor that laughs at air fresheners. If any of this looks familiar, you might be beyond prevention and into repair territory. That’s where our crew shines. We dry what’s wet, remove what’s ruined, and restore what matters. If you need help now, head over to our Water Damage Restoration page and we’ll get you back to normal quickly and safely.
What Not To Do
Do not wrap the outside of the tank with random foam and call it a day. External wraps get soggy, grow mold, and look like a science project gone wrong. Do not paint the inside of the tank with waterproofing paint. It will flake into the water and foul the internals. Do not block or tape over your fan grille. It needs to breathe to work. And when insulating pipes, leave valves and unions visible so you can spot an actual leak if one ever appears. The goal is pipe condensation prevention, not turning your plumbing into a mystery burrito.
Real-World Win From A Simple Fix
A homeowner called us about a “mystery leak” around their downstairs toilet. No burst line, no cracked wax ring. The tank was sweating like a glass of iced tea in August. That slow drip had soaked the vinyl and softened the particleboard subfloor. We dried the assembly, replaced the compromised subfloor section, then had a plumber install an anti-sweat valve and we added pipe insulation to the nearby cold line. Total cost: a fraction of what a full bathroom rebuild would have been. The tank has stayed dry ever since. If your bathroom plays this same game, act before the subfloor gives up.
FAQ: Toilet Tank Sweating
Does an anti-sweat valve damage toilets?
No. It just tempers the cold refill water a few degrees. Your toilet’s parts do not care if the water is 55 degrees or 70 degrees, and the bowl will not feel warm. Properly installed, it’s a set-it-and-forget-it fix.
Is a foam tank liner safe?
Yes, reputable liners are designed for this exact use. Install clean and dry, keep foam clear of moving parts, and let adhesives cure before refilling. If your water is very hard or you use tank treatment tablets, check the liner occasionally and re-secure if needed.
Will a dehumidifier alone stop toilet tank sweat?
Sometimes, especially in small bathrooms. But the best results come from combining humidity control with either a tank liner or an anti-sweat valve, plus fixing any run-on that keeps the tank cold all day.
Why does my toilet only sweat in summer?
Warm summer air carries more moisture. When that air hits a cool tank or pipe, condensation forms faster. In winter, indoor air is usually drier, so you don’t see it as much unless you have serious ventilation issues.
Can I insulate the flexible supply hose too?
You can, but leave a clear view of the shutoff valve, the connector, and the first inch of hose so you can inspect for leaks. Focus on the rigid cold line and the toilet feed first, where condensation is usually worst.
Is there a toilet that never sweats?
Some newer tanks ship with factory insulation that cuts condensation dramatically. If humidity is under control and you choose an insulated model, sweating can be gone for good. If your bathroom is steam-central, add an anti-sweat valve for a belt-and-suspenders approach.
Could a running toilet be the whole problem?
Absolutely. A slow flapper leak keeps refilling the tank with cold water, which chills the porcelain and guarantees condensation in humid rooms. Fix the leak first. If sweating continues, add insulation or a mixing valve.
When To Call Pros
Call a licensed plumber if you want an anti-sweat valve installed or need help running a hot line to the toilet. Call our restoration team if you find soft flooring, crumbling cabinet bottoms, or any signs of mold. We’ll assess moisture, dry what’s wet, and repair materials the right way so problems do not return. If humidity is your persistent enemy, this guide on mold and moisture control is worth a read: Humidity & Mold. And if you suspect the sweating has already caused hidden damage, start here: Hidden Water Leaks.
Stop Toilet Tank Sweat For Good
Pick your weapons. Fix the run-on so the tank isn’t an ice bath. Vent the room and keep humidity under control. Insulate the tank and the cold lines if needed. If the room stays muggy or the tank just insists on shivering, install an anti-sweat valve and be done with it. Pipe condensation prevention is not guesswork. It’s simple physics, a few targeted upgrades, and the discipline to run that exhaust fan like you mean it. If condensation already won the first round and your bathroom or kitchen paid the price, we can help with clean-up and restoration. When you’re ready to keep the water where it belongs, reach out through our Water Damage Restoration page and we’ll get your home back on solid, dry ground.